On the Application page, designate your travel dates then supply Vehicle, Axle, Load, and Overall Dimension information.
Follow the procedures from the My Queue or the Application page to open an application.
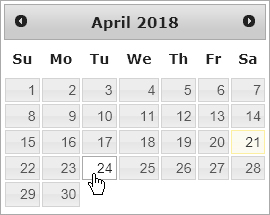
In the Travel Dates area, click the calendar icons to choose both a From Date and a To Date.
In the Vehicle Configuration area, you can either choose from a table of stored vehicles or manually enter vehicle details.
Expand the Stored Vehicles/Units section by clicking the [+] mark.
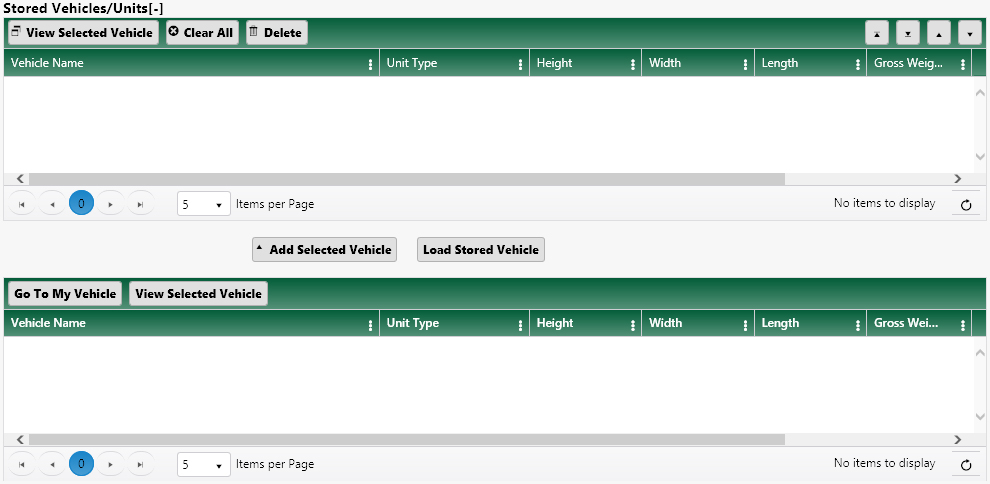
Select a vehicle from the lower table then click the Add Selected Vehicle button.
The chosen vehicle will appear in the upper table.
Select the vehicle in the upper table then click the Load Stored Vehicle button.
The data from the record will populate the Vehicle Information area of the page.
Expand the Vehicle Type drop-down then choose from the available options.
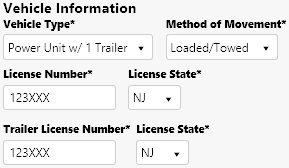
Your choice from the Vehicle Type drop-down will govern the options that appear below.
In the Load Information area, expand the Description drop-down and choose from the available options then select a Load Quantity.
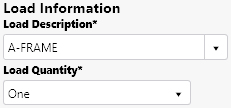
If the Load Description field is visible, enter more specific information about the nature of the load.
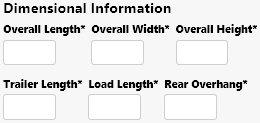
In the Dimensional Information area, enter the Length, Width, and Height of the loaded vehicle then supply the Trailer Length, Load Length, and Rear Overhang.
In the Gross Weight/Axle Configuration area, enter the Number of Axles and the Gross Weight in the fields provided.

In the Route Information area, expand the Origin and Destination drop-downs then choose a general location from the available options.

On the Application Attachment panel:
Expand the Attachment Type drop-down and choose from the available options or enter a brief description of the files that you wish to attach.
Click the Browse File button and navigate to the desired document or image then click the Upload File button.
The progress bar will fill while the file is attached.
When the attached file appears in the table, click the Edit button to open the Comment options.
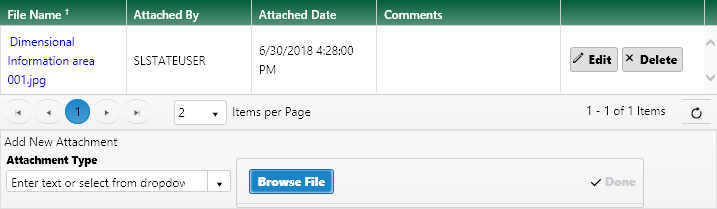
In the Comments area, enter any additional information in the text box. Previously recorded comments are organized in the table below.
Click the Save button to avoid losing your application.

Click the Continue button to advance to the next page of the application.

The system will review the information that you've entered on this page, and if changes are required, a list of problematic elements will appear.